Creating tasks
There are two quick ways to create a task in Gridflo, and both open the same New Task dialog.
Two ways to add a task
- From anywhere: click Add Task under Quick Actions in the sidebar. It's always available, no matter which page you're on.
- From a board: open any project under Tasks in the sidebar and click + Add Task on the board.
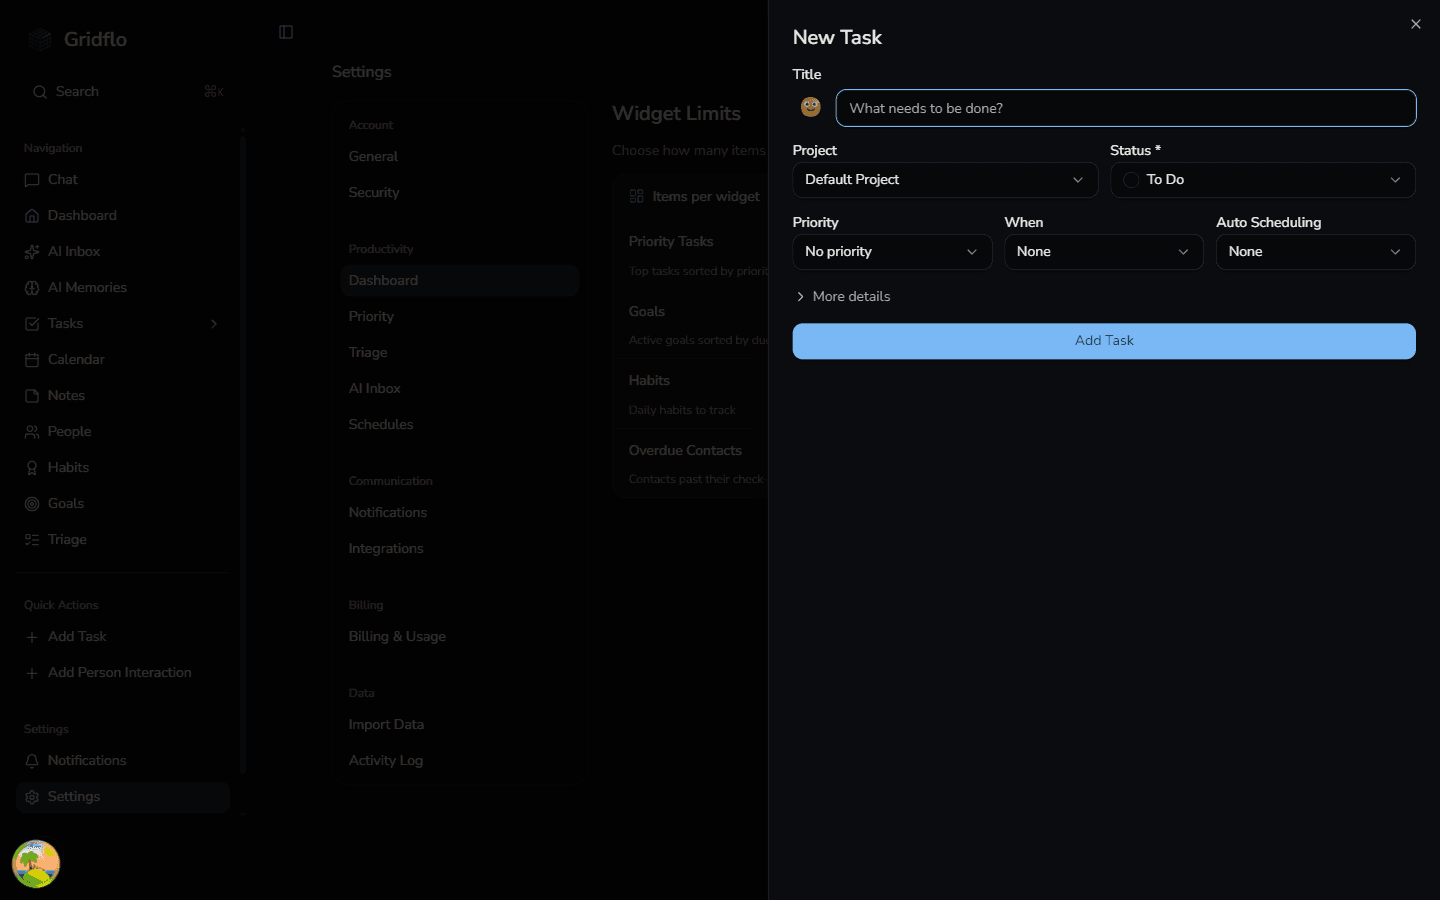
The New Task dialog
- Title: the only required field — just describe what needs to be done. You can also pick an emoji for the task.
- Project: which project the task belongs to. If you don't choose one, it goes to your Default Project.
- Status: the board column the task starts in, such as To Do.
- Priority: Critical, High, Medium, Low, or no priority.
- When: when the task should happen — ASAP, Today, This Week, Next Week, By Date, or Someday. Gridflo fills in a due date for you based on your choice.
- Auto Scheduling: optionally assign a schedule so Gridflo can block out time for the task on your calendar. See Scheduling and priorities for how this works.
More details
Click More details to expand extra fields: a description, a duration estimate, tags, and links to related notes, people, or goals. If you picked By Date, you can also set a start date, and once the task has a due date you can add reminders.
When you're done, click Add Task. The task appears on its project board right away — read Projects and boards to see where it lands.